
Iris Keyboard
I’ve been using a Microsoft ergonomic keyboard for around the last five years. The layout suits me, but the switches are mushy. I’ve often looked at fully split boards but been put off by the price, for example, the Moonlander looks incredible. However, the price is around $400 dollars before adding whatever random import duty comes into play.
I took a look at the excellent Mechboards site that has a series of kits available to build yourself. The advantage of building your own is the option to select whatever components you want. So for example I can select the cherry blue “clicky” keyboard switches.
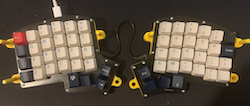
As such I selected an Iris with a couple of pro micro-controllers, 60 Cherry blue switches and some generic key-caps. The kit came with a base plate, diodes, reset switches, TTRS connectors and cables. It didn’t come with any case or tenting beyond the plates, but I had a plan to use the 3D printer to sort that.
In my distant past, I had a summer job at an electronics factory. So with the hope of muscle memory coming back to the fore, I dusted off my soldering iron.
It turned out to be less intimidating than I thought it would be. Keebio has a decent build guide. The two halves are symmetrical bar the addition of the controller.
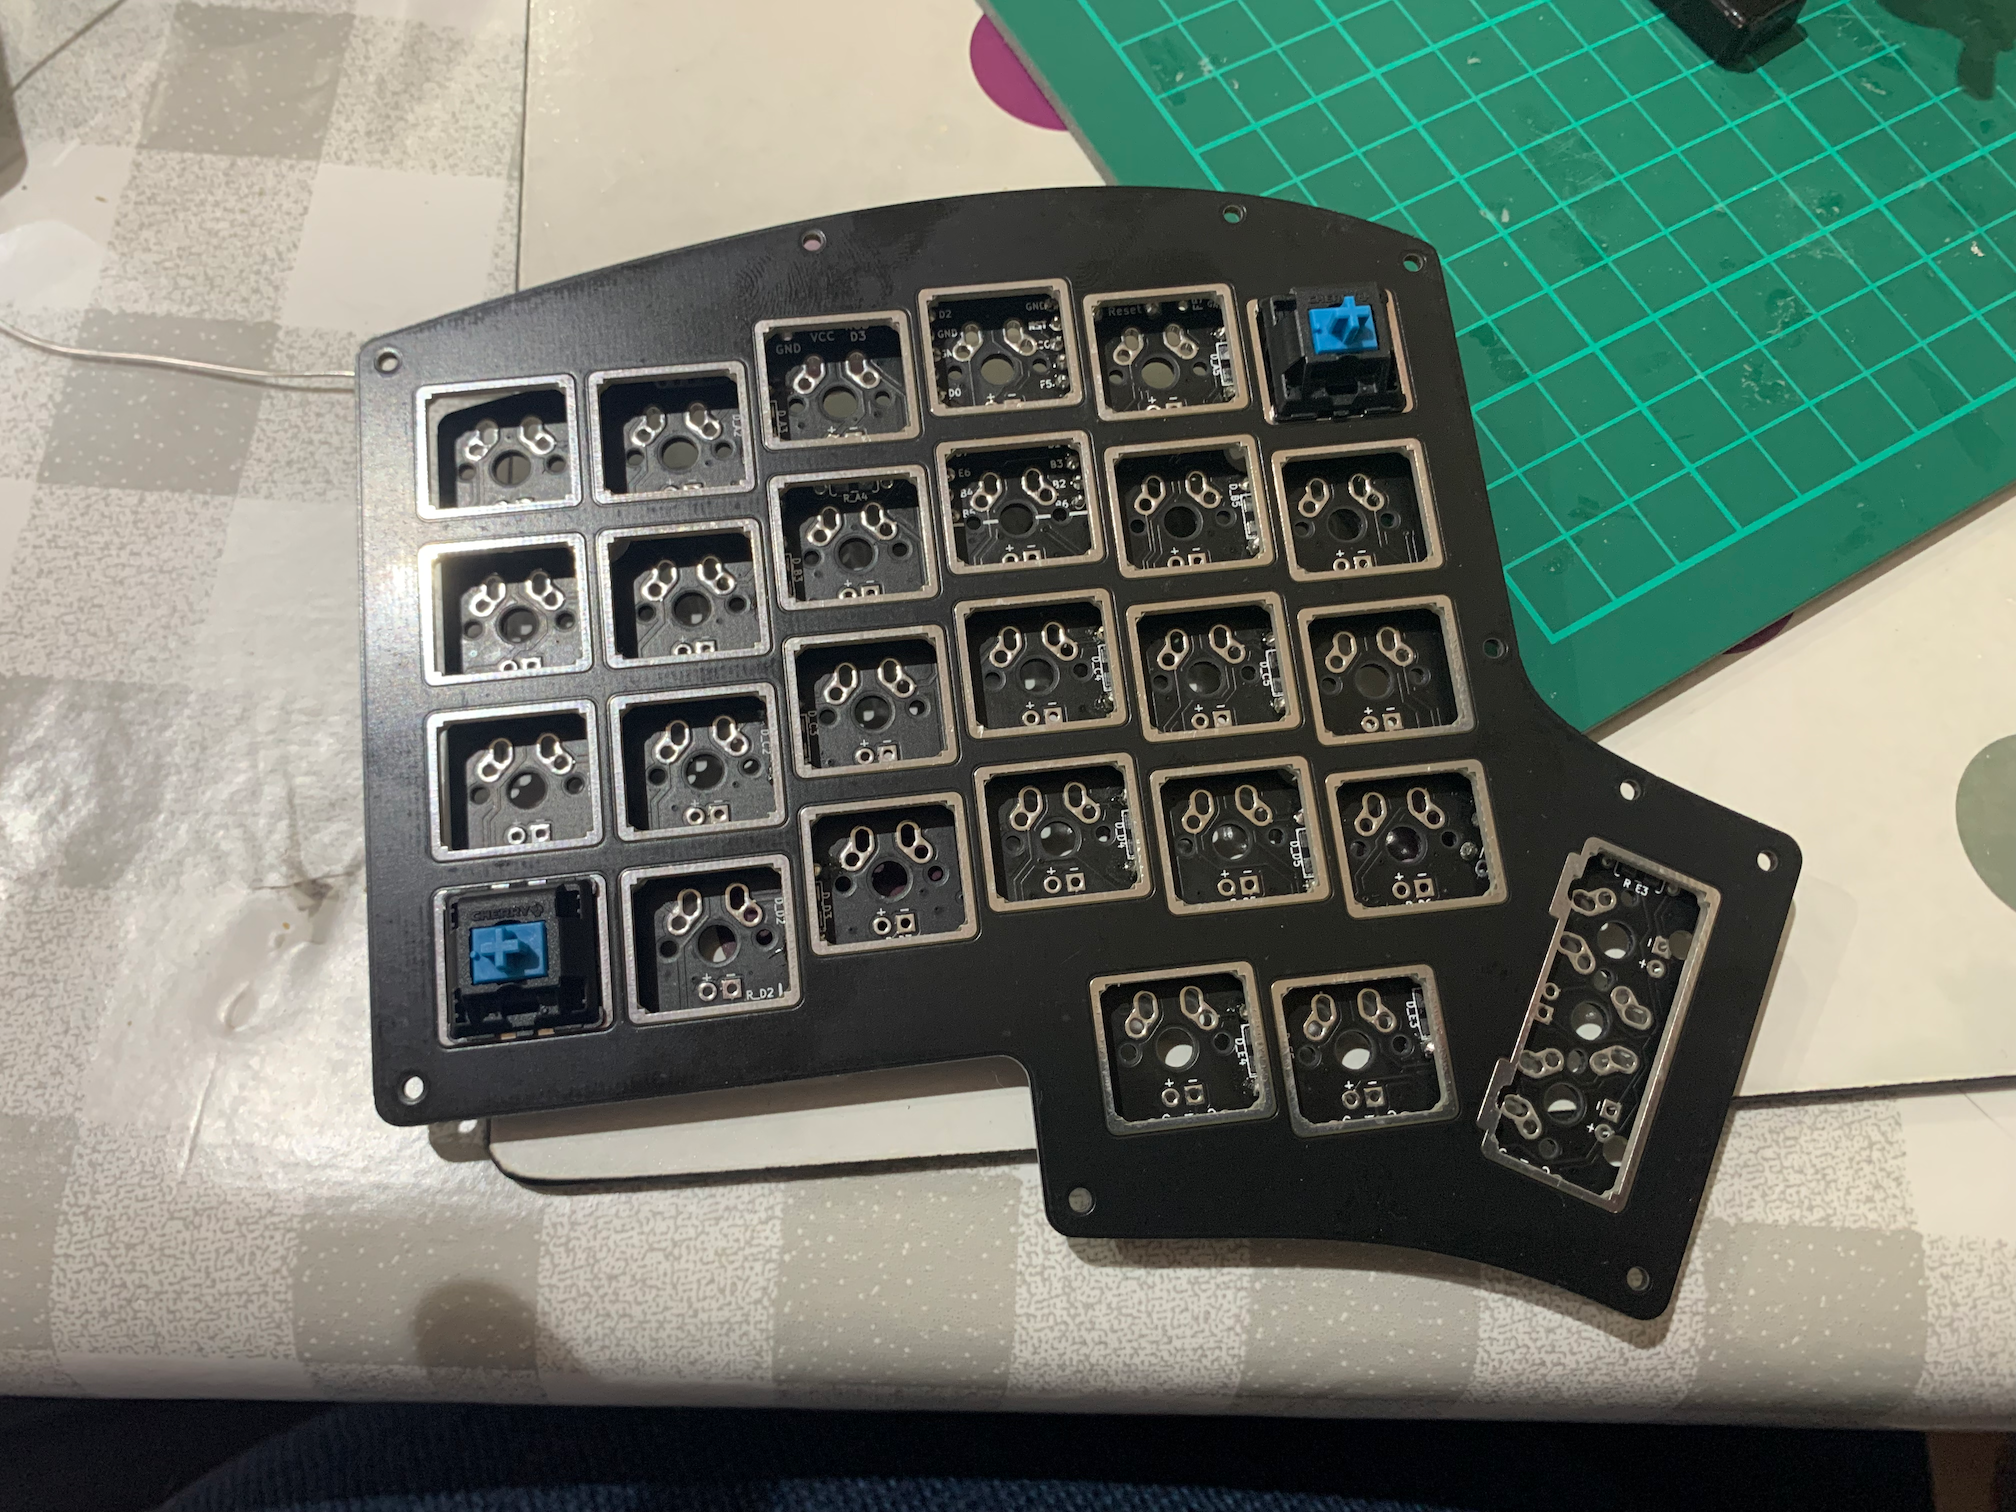
The first job was to solder a diode for each key switch. The dark line is towards the base of the board for each one.
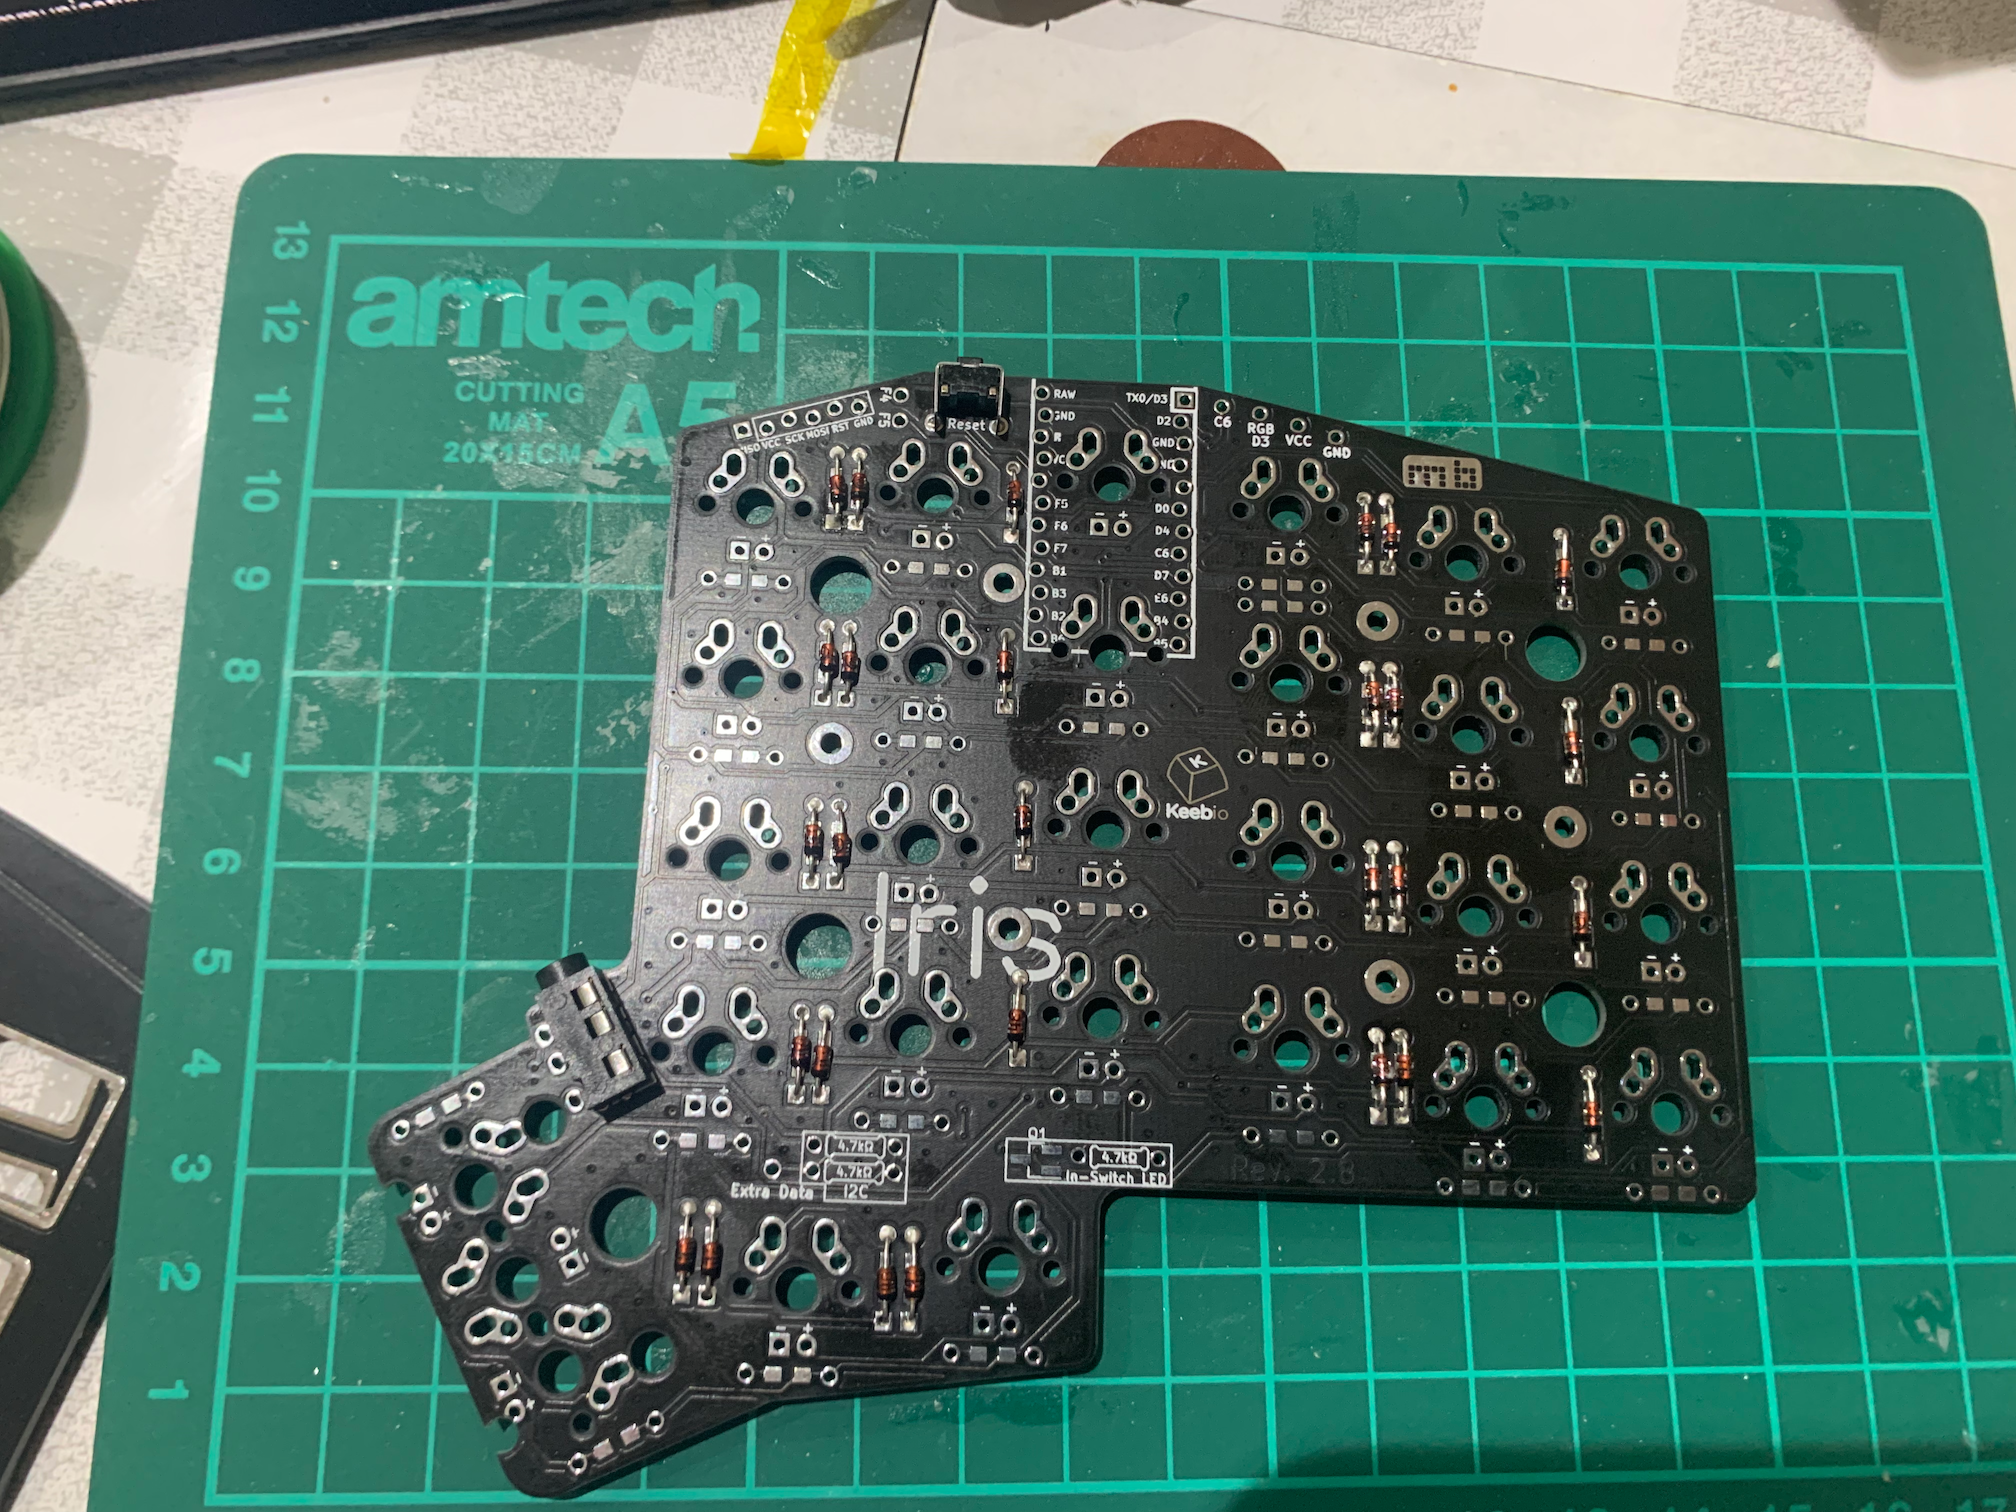
Followed by the TTRS plug and the reset switch.
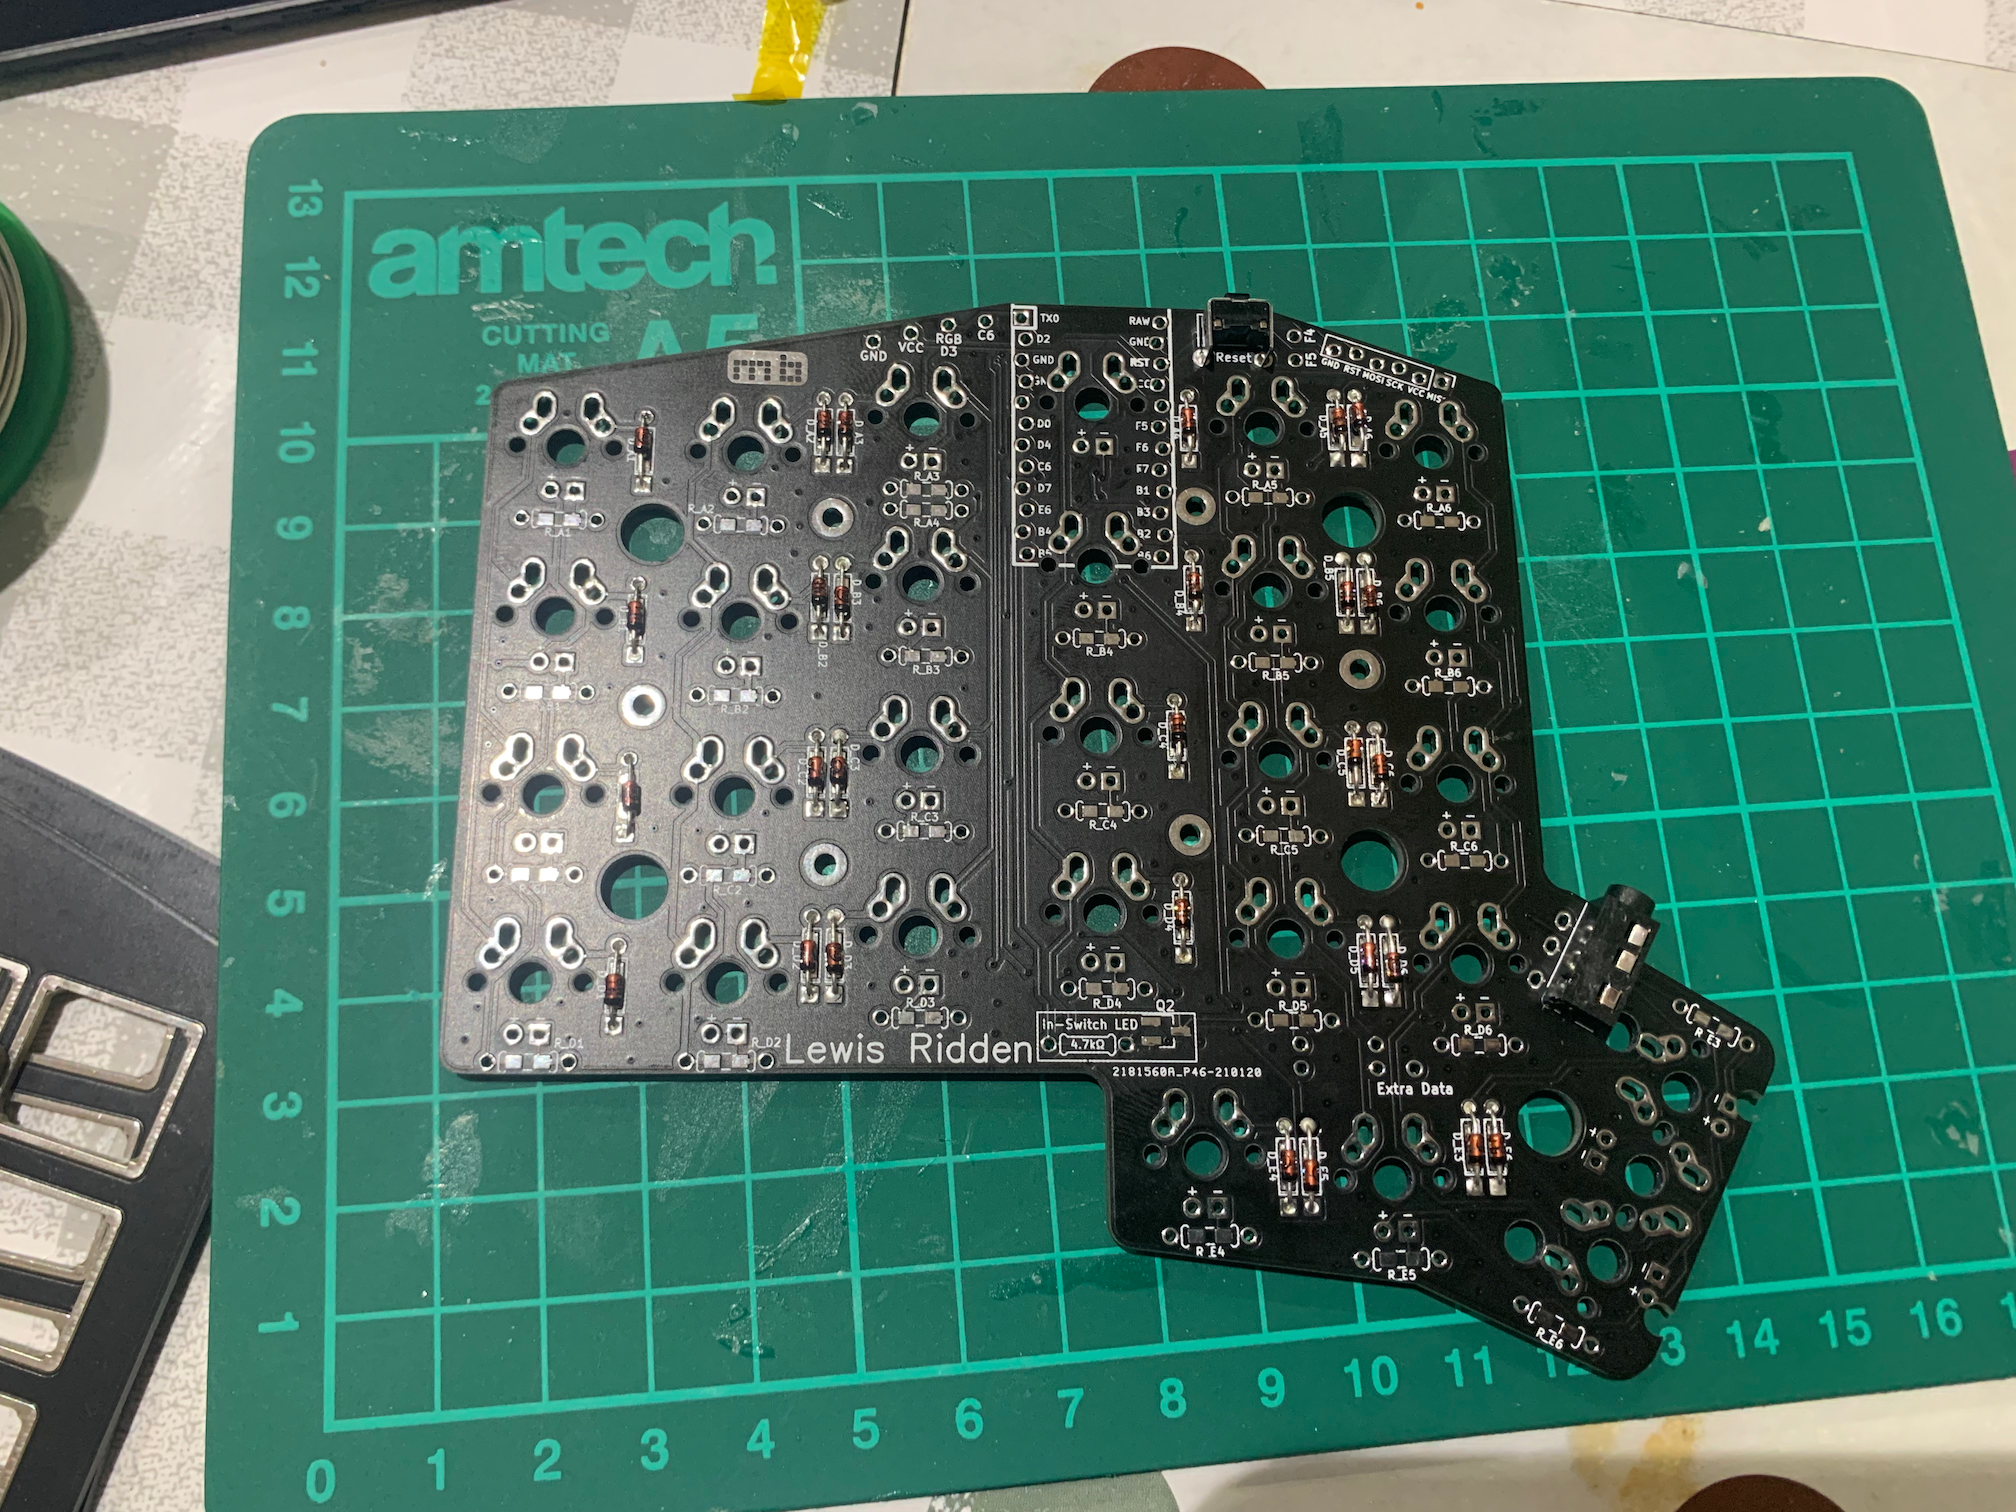
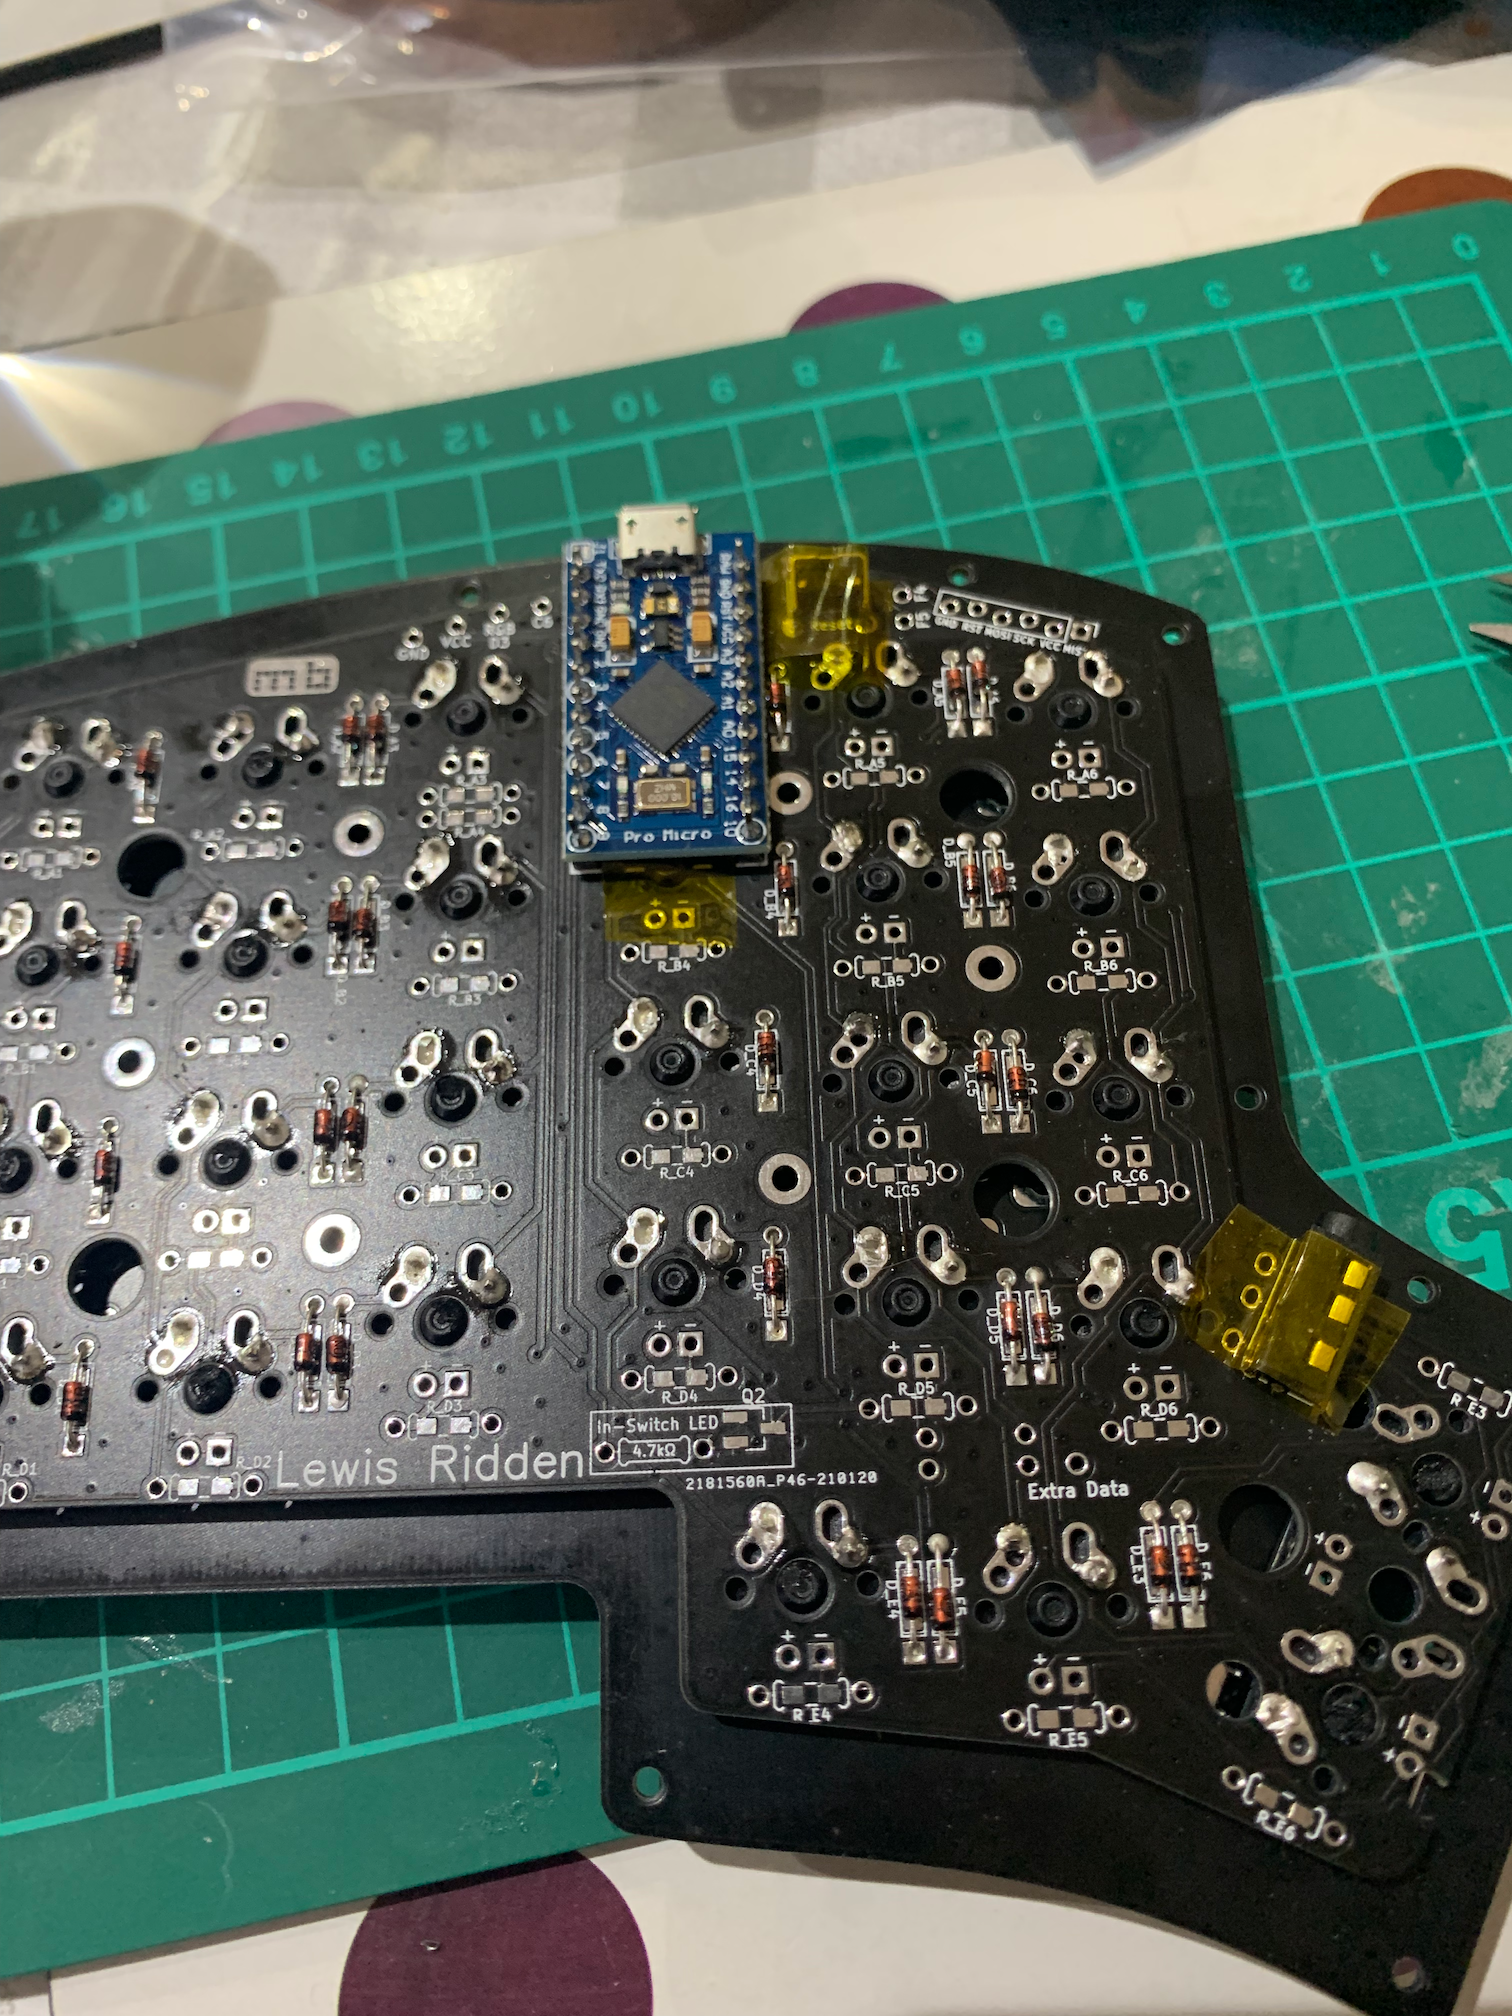
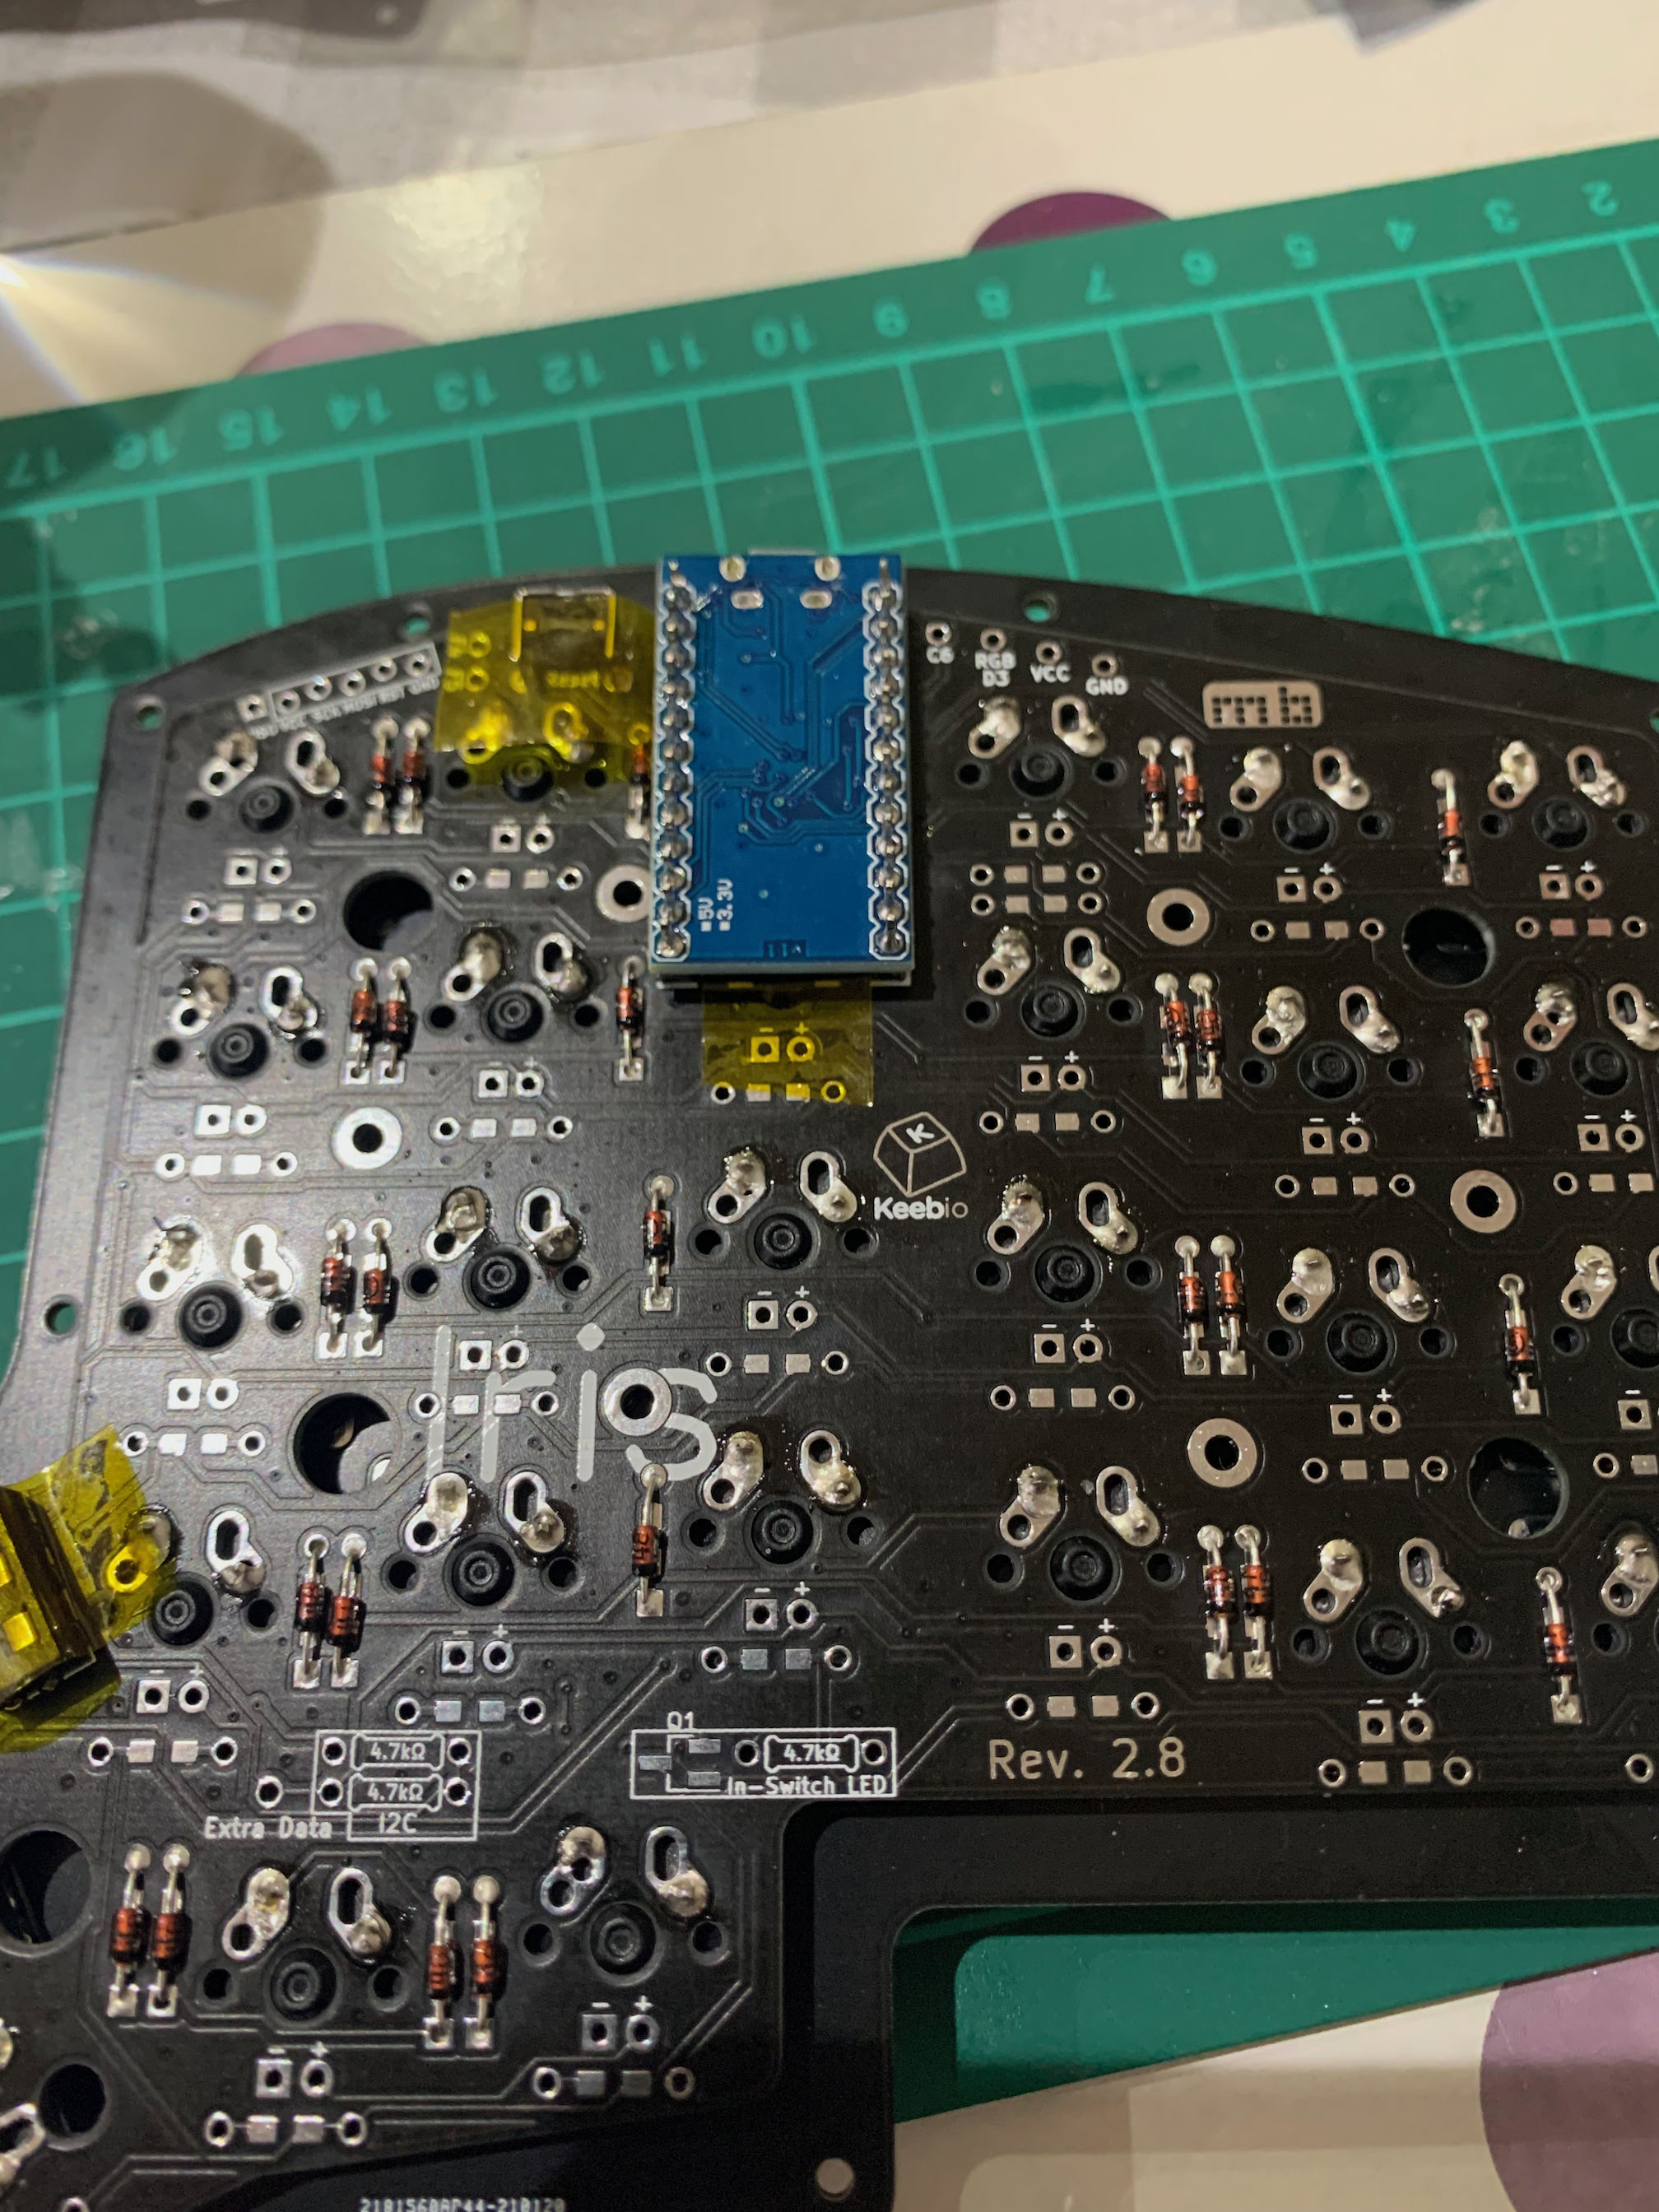
Then add the headers for the controller boards.
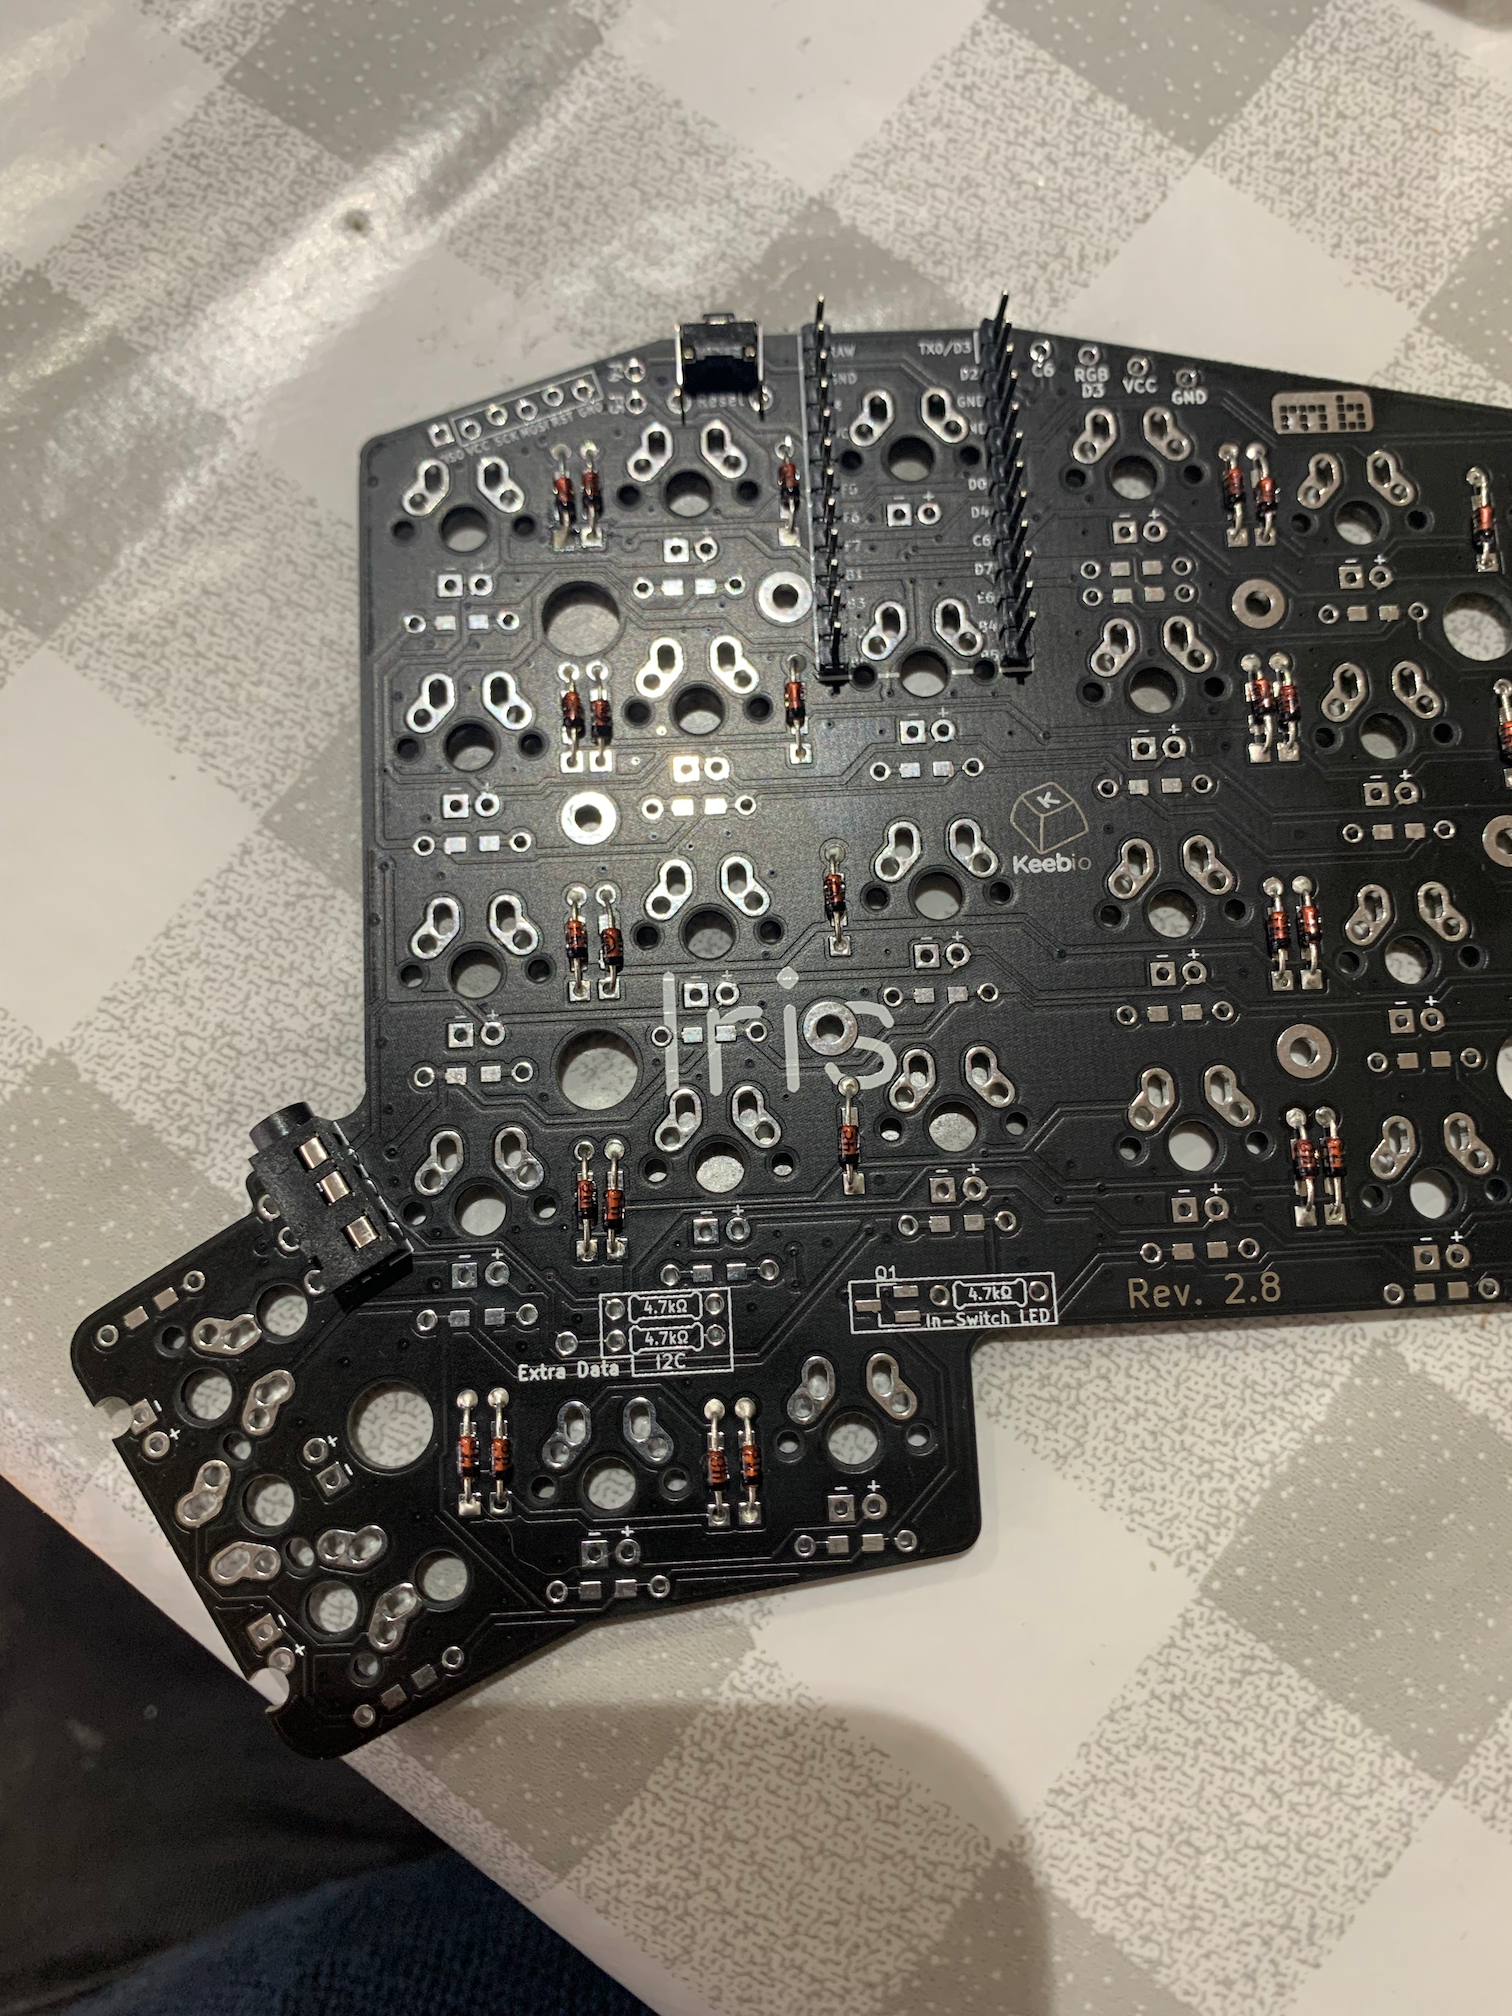
Then push the switches through the top plate and solder them to the board.
Once all the key switches are soldered add some heat tape over all the reset, TTRS ports and under the controller. Nite that one controller is mounted as shown, the other has the components face down.
Thingiverse has a nice mid-layer and tenting screws available to allow lots of adjustments to the position of the keyboard. I printed those out and screwed the base to it.
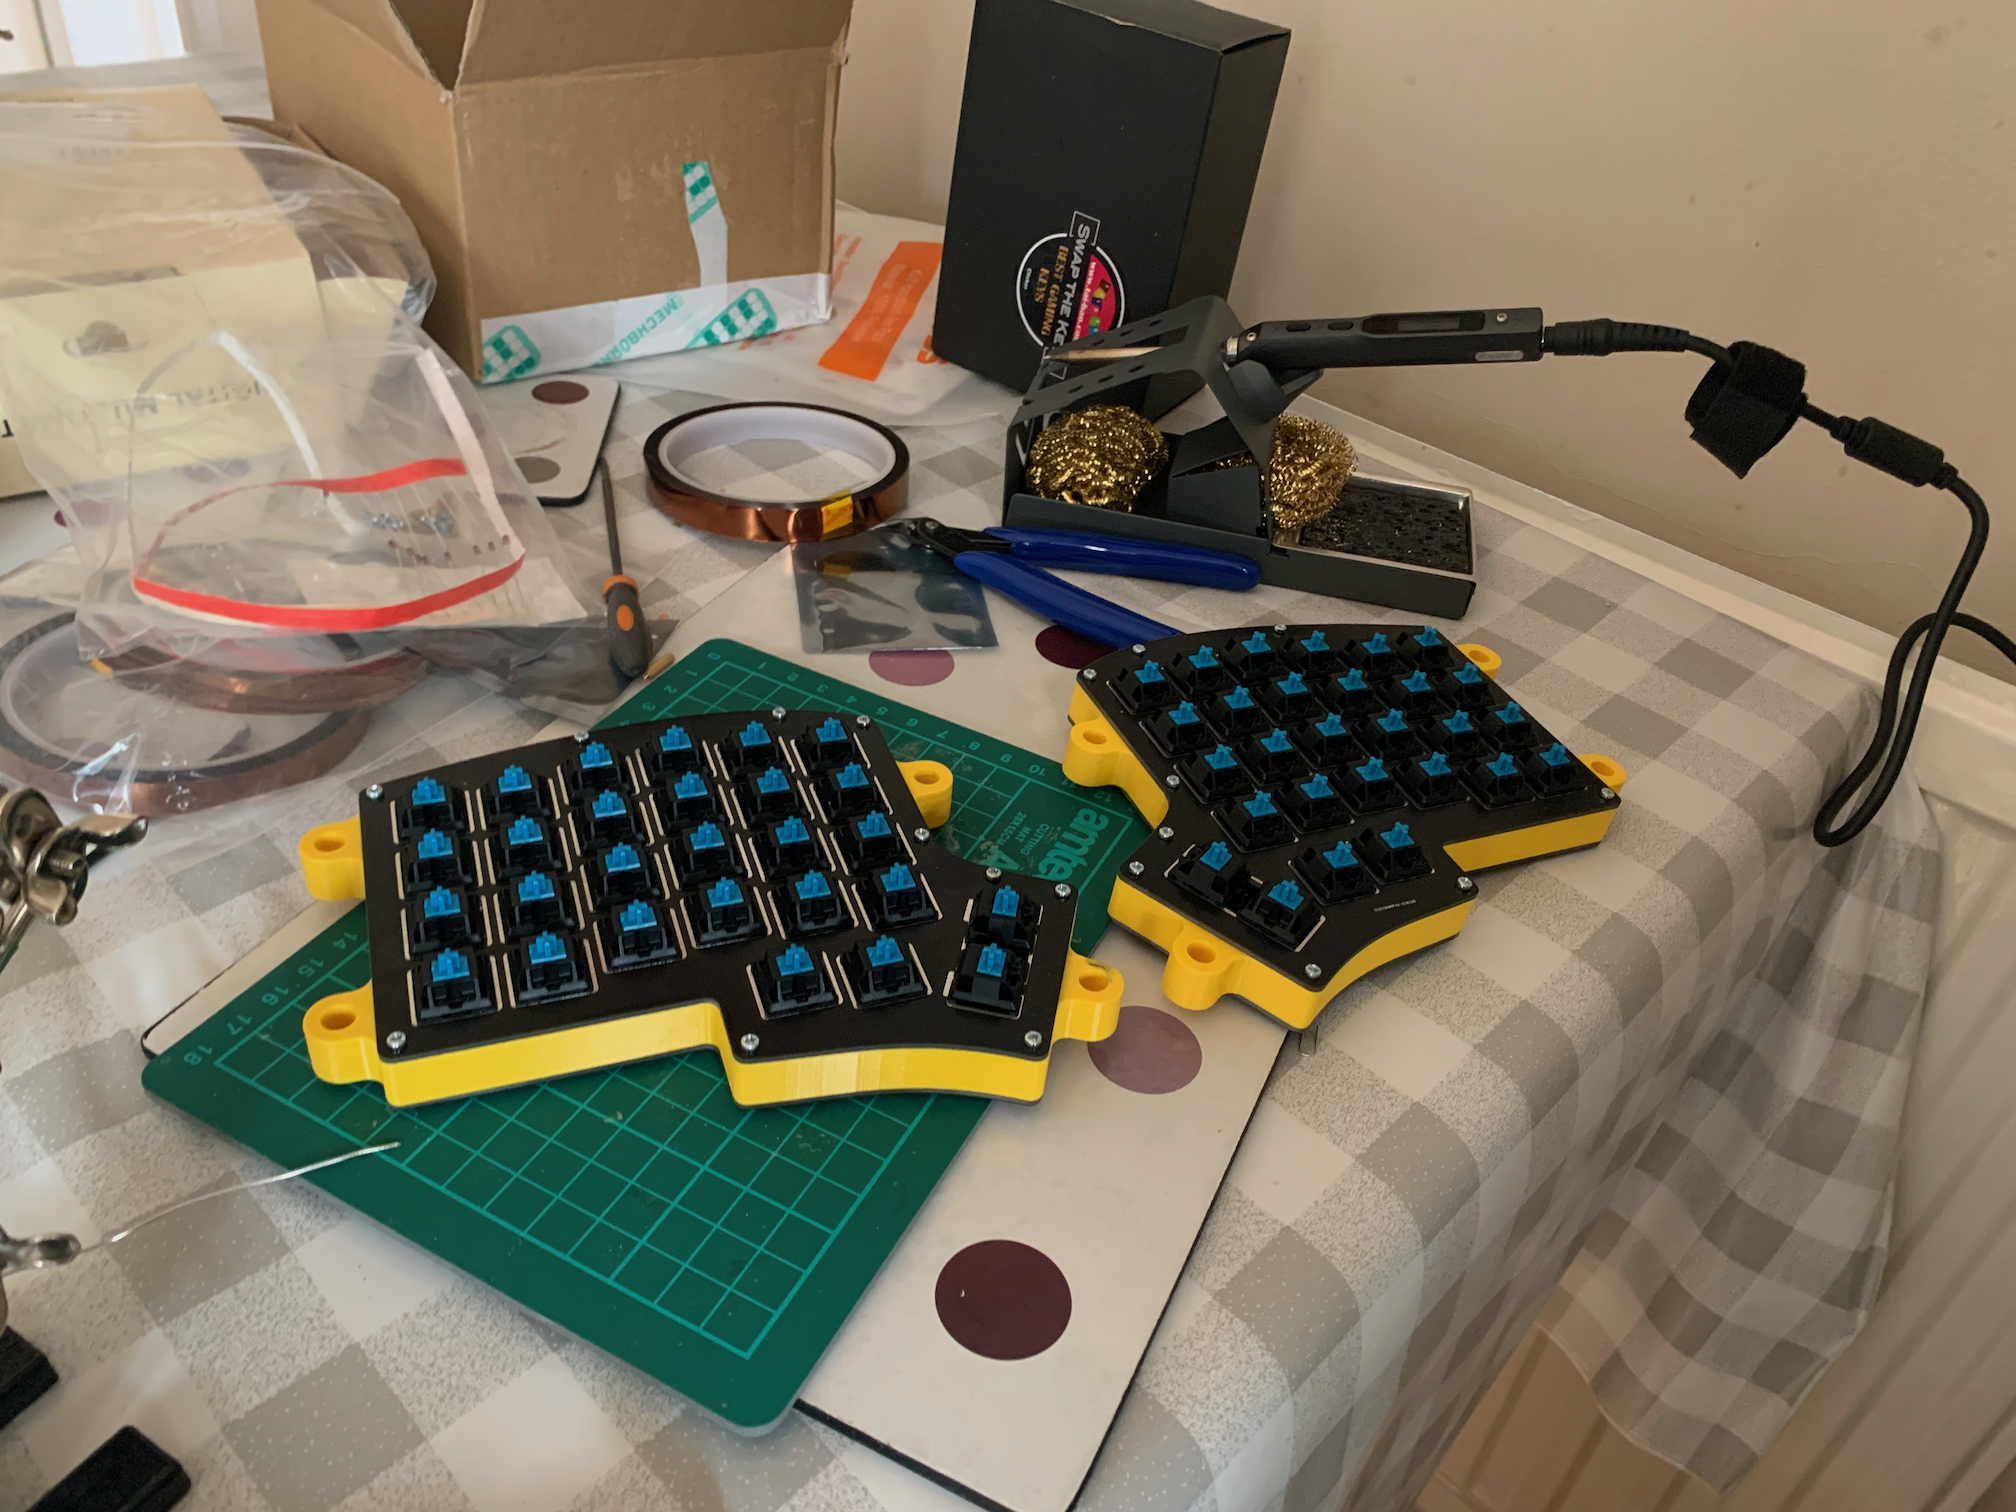
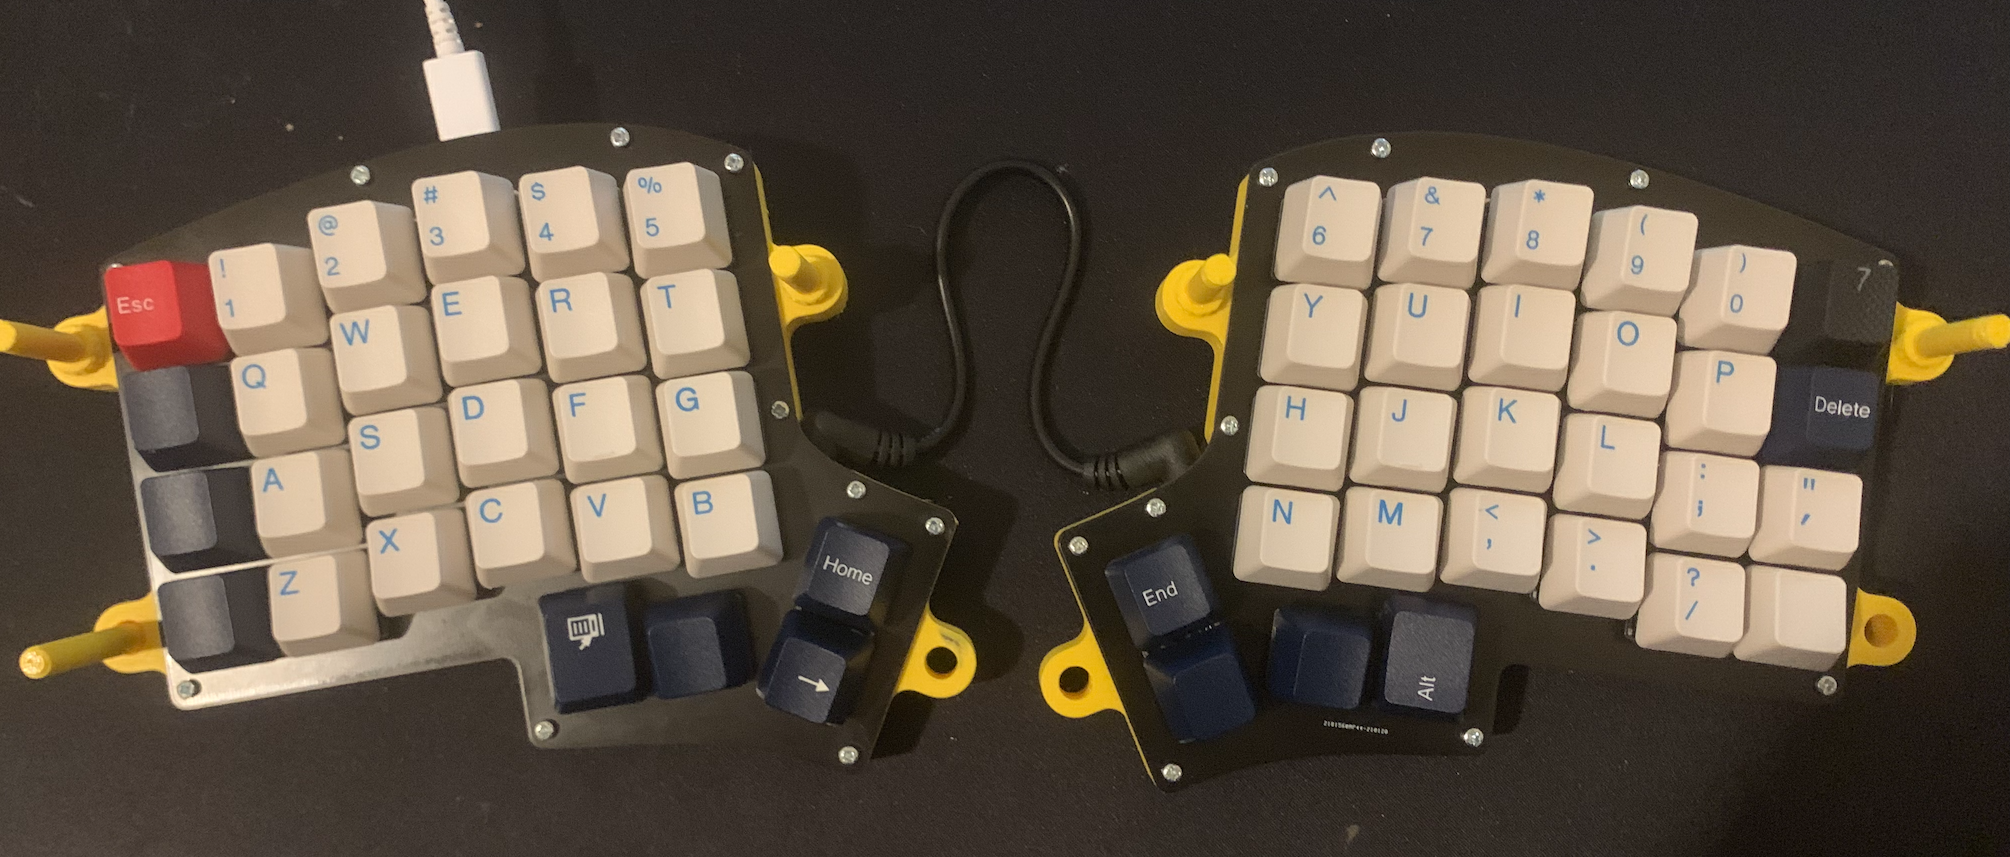
Then I added the keys.
The next post will cover flashing and trouble-shooting the software.